| Opening the
Display |
|
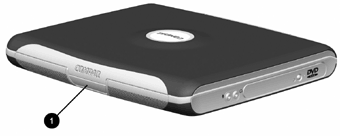
- Display Release Latch (button): Press this button and pull up
on the Display Release Tab to open the unit.
|
|
| Front View |
Image |
-
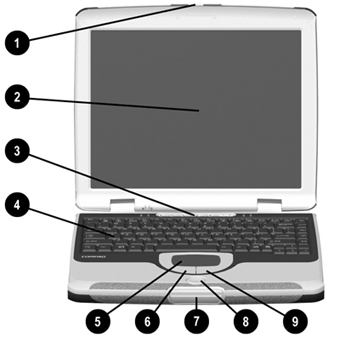
Display Release Tab
- Display Panel
- Power Button
- Keyboard
- Touchpad
- Left Touchpad Button
- Display Release Latch
- Easy Scroll Button
- Right Touchpad Button
|
|
| Left View |
|
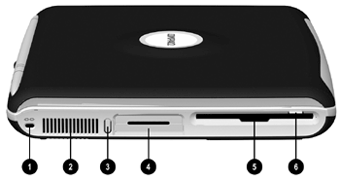
- Security Lock Slot
- Air Vent
- PC Card Eject Button
- PC Card Slot
- Floppy Drive
- Floppy Eject Button
|
|
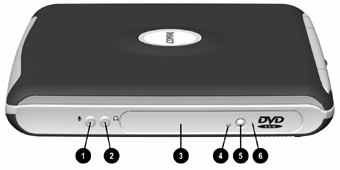
| Right View |
|
- Microphone Jack
- Headphone Jack
- Optical Drive
- Optical Drive Activity Light
- Optical Drive Eject Button
- Manual Eject Hole
|
|
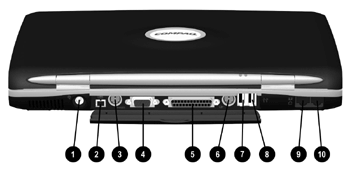
| Back View |
|
- A/C Adapter Connector
- 1394 Port (on select models)
- S-Video (TV Output) Port
- External Monitor (VGA) Port
- Printer/Parallel Port
- Keyboard/Mouse Port
- USB Port (1)
- USB Port (2)
- 10/100 Ethernet Port
- Modem Port
|
|
|
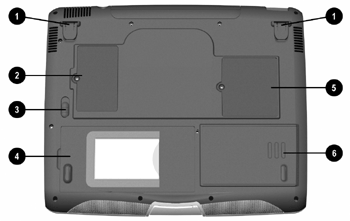
Bottom View |
|
- Pop-Up Feet
- Expansion Memory Compartment
- Battery Release Switch
- Main Battery Compartment
- Modem Compartment
- Hard Drive Access Panel
|
|
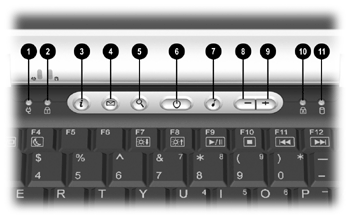
| Easy Access Keys |
|
- A/C Adapter Light
- Num Lock Light
- Instant Internet Access Button
- Instant E-Mail Button
- Search Button
- Power Button
- Digital Audio Button
- Volume Down Button
- Volume Up Button
- Caps Lock Light
- Hard Drive Access Light
|
|
| Power LED Lights |
|
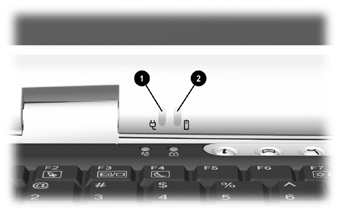
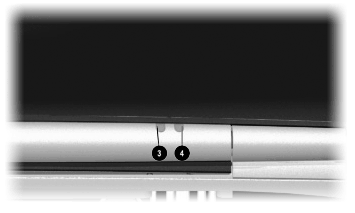
- Power Indicator Light
- Battery Indicator Light
- Battery Indicator Light
- Power Indicator Light
Note: The battery light will be orange when the battery is
charging. When the battery drops to 10% remaining, the unit will
beep and the battery indicator will begin to flash.
Note: The Power Indicator Icon will be  instead
of the one shown in the graphic. instead
of the one shown in the graphic. |
|
