 |
- Prepare the computer for disassembly
- Remove the LED cover
- Remove
the keyboard
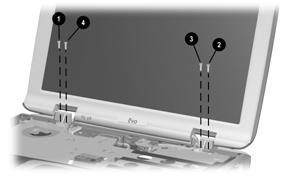
- Remove the two silver TM2.5 × 6 screws 1 that
secure the hinge covers to the base enclosure
- Lift the front edge of the hinge cover 2 until it
separates from the base enclosure.
|
 |
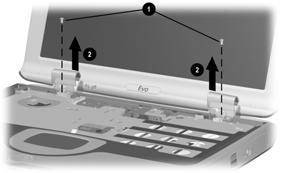
- Position the display so it rests at a 90-degree angle in
relationship to the work surface.
- Press forward on the back of the hinge cover
1
- Remove the hinge cover 2
|
 |
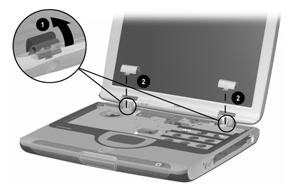
- Remove the pewter TM2.5 × 9 screw 1 that secures
the display backlight 2 and display video ground
cables 3 to the heat spreader
|
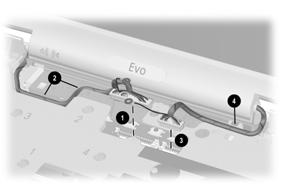 |
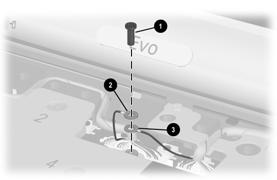
- Disconnect the display backlight cable 1 from the
system board and unroute the cable 2 from the heat
spreader.
- Disconnect the display video cable 3 from the
system board and unroute the cable 4 from the heat
spreader
|
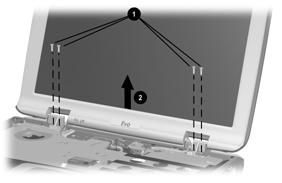 |
- Remove the four silver TM2.5 × 10 screws 1 that
secure the display to the base enclosure.
|
 |
CAUTION: Secure the display when removing these screws.
The display is secured to the computer only by these screws and will
fall if not supported during screw removal. |
|
- Remove the display 2
|