 |
- Prepare the computer for disassembly and remove the following
components:
- LED cover
- Keyboard
- Display
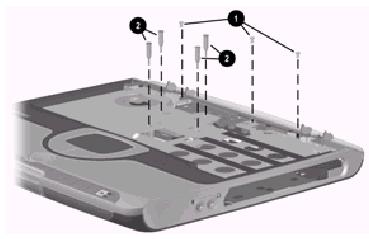
- Remove the three silver TM2.5 ū 6 screws 1 that
secure the heat spreader to the base enclosure
- Remove the four silver TM2.5 ū 25 spring-loaded screws
2 that secure the heat spreader to the base enclosure.
|
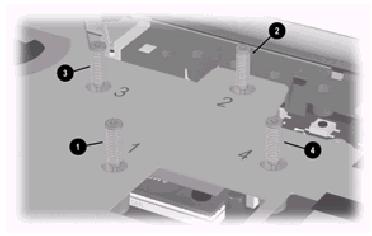 |
NOTE: The spring-loaded screws should be removed and installed in the
1, 2, 3, 4 sequence stamped in the heat spreader |
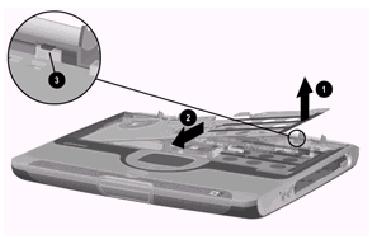 |
- Lift up the front right side of the heat spreader
1 and slide it forward 2 until the
back edge of the heat spreader clears the tab 3 on the
base enclosure
|
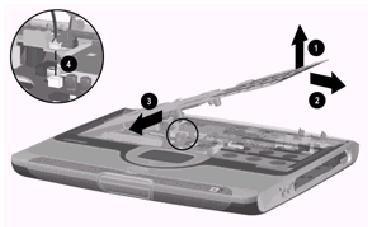 |
- Lift up the right side of the heat spreader 1
until it rests at an angle
- Slide the heat spreader to the right at an angle 2
until the left side of the heat spreader clears the base enclosure.
- Slide the heat spreader forward 3 and rest it on
the palm rest.
- Disconnect the fan cable 4 from the system board.
|
 |
- Remove the heat spreader.
NOTE: The heat spreader thermal
pad should be replaced every time the processor is
replaced. |