Removing and Installing the Processor


Removing the Processor

  1. Prepare the computer for disassembly and remove the following components:
    1. LED cover
    2. Keyboard 
    3. Optical Drive Device
    4. Display 
    5. Heat Spreader
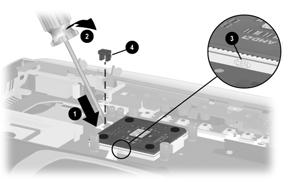
  2. If a stopper 1 is installed in the left slot (marked “Lock”), remove it
  3. Insert a flat-bladed tool into the right slot (marked "Open") 2 
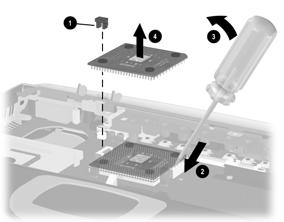
  4. Swing the tool to the left 3 to unseat the processor in the socket on the system board.
  5. Lift the processor straight up and remove it 4 
Top of Page

Installing the Processor

When installing the processor, insert a flat-bladed tool in the left “Lock” slot. 1 Swing the tool to the right 2 to seat the processor in the socket on the system board.

If the processor socket has the letters “CEN” 3 printed on the front, install a stopper 4 into the “Lock” slot.

Top of Page