 |
- Prepare the computer for disassembly and remove the following
components:
- LED
cover
- Keyboard
- Optical
Drive Device
- Display
- Heat
Spreader
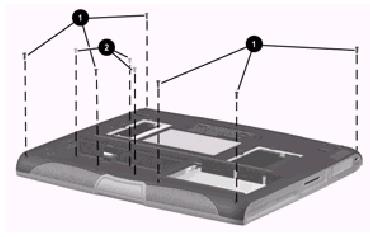
- Turn the computer bottom side up with the front facing forward.
- Remove the six pewter TM2.5 × 9 screws 1 that
secure the top cover to the base enclosure
- Remove the three silver TM2.5 × 6 screws 2 in the
battery bay that secure the top cover to the base enclosure.
|
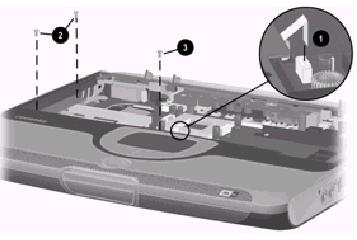 |
- Turn the computer top side up with the front facing forward.
- Disconnect the TouchPad cable 1 from the low
insertion force (LIF) connector on the system board
- Remove the two silver TM2.5 × 6 screws 2 and the
pewter TM2.5 × 9 screw 3 that secure the top cover to
the base enclosure.
|
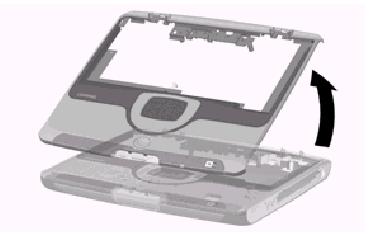 |
- Swing the back edge of the top cover up and forward until the front
edge of the top cover disengages from the base enclosure
- Remove the top cover.
|