- Prepare the computer for disassembly and remove the following components:
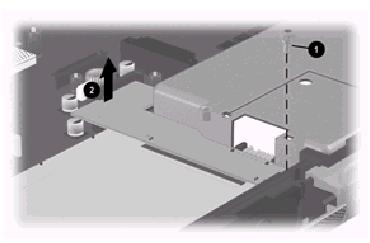
- Remove the silver TM2.5 × 6 screw 1 that secure the charger board to the system board
- Lift up on the back edge of the charger board 2 to disconnect it from the system board.
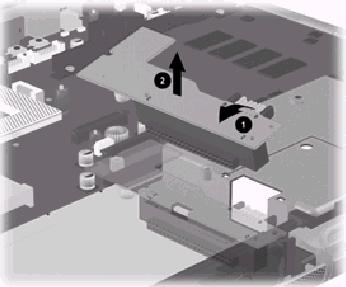
- Swing the right side of the charger board up and to the left 1 until the hard drive connector clears the system board
- Remove the charger board 2